Specify Lustre User Authentication via the LDAP Screen

Configure LDAP for Lustre user authentication on ClusterStor L300 and L300N systems.

  • LDAP has been selected as the Lustre user authentication method.
  • If the LDAP server is being specified using the hostname, the DNS must first be configured (as part of Configure Lustre Network Interfaces).
  1. On the CSM Configure tab, select LDAP from the left side menu, as shown in the figure.
    Figure: LDAP Screen
  2. In the LDAP Server field, enter the LDAP server's hostname or IP address (if not already displayed).
    The LDAP server can be specified either as a hostname or as an IP address. ClusterStor L300 and L300N systems use service discovery (DNS-SD) to query the DNS server and discover the LDAP server's hostname/IP address. If the system cannot identify the LDAP server, an empty field displays and this value must be entered manually.
    Important: If the LDAP server is being specified using the hostname, the DNS must first be configured.
  3. In the Port field, enter the port number value.
    The default value of the port is 389. LDAP can be configured to run on a non-standard port if SSL encryption is not used. Enter either the specific port number or the default of 389.
    Important: If TLS/SSL is used with the LDAP server, TLS/SSL port 636 must be used.
  4. If needed, specify additional LDAP servers and ports by clicking the green '+' button and entering a valid host DN value.
    Clicking the red '' button removes the extra LDAP server and port, if required. A maximum of six LDAP servers and ports may be specified.
    Figure: LDAP Additional Servers and Ports Screen
  5. To use TLS/SSL for accessing LDAP, perform the following.
    Figure: Storage Cluster Authentication Checkbox Screen
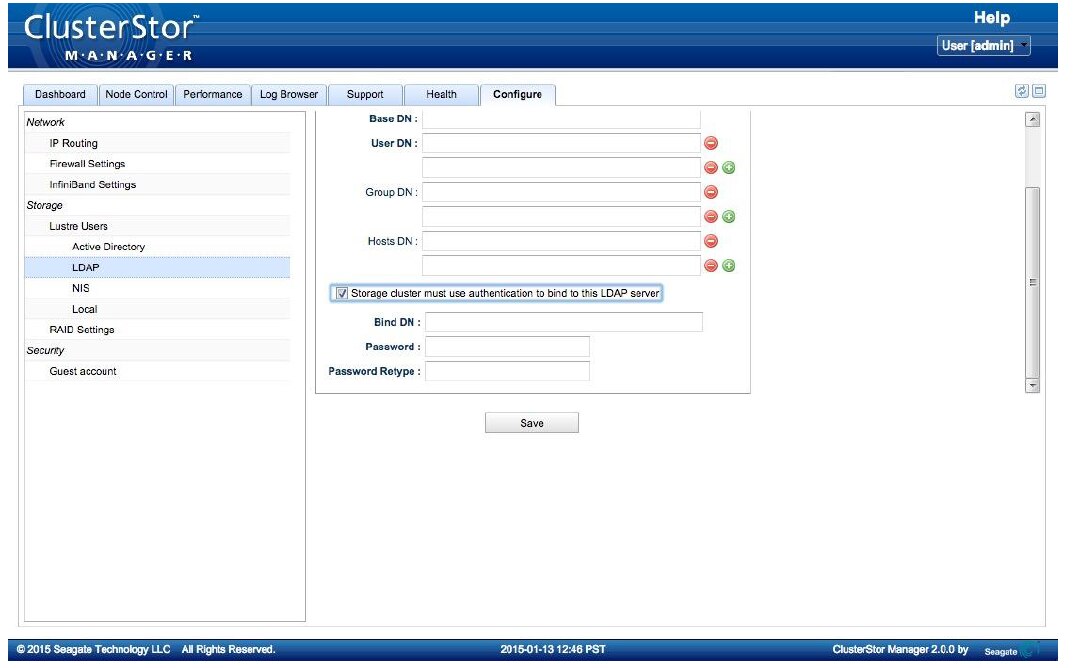
    Important: Use TLS/SSL port 636 if TLS/SSL is used with LDAP.
    1. Check the Use TLS/SSL for accessing LDAP box.
    2. Click the Choose a file... button, to select one of the three methods:
      • Private key
      • Client certificate
      • Optional CA certificate
    3. Browse to, and select, the desired file.
    4. Click Open.
  6. In the Base DN field, enter the base DN (distinguished name) value.
  7. In the User DN field, enter a valid user DN value.
    Important: The User DN field remains blank until a base DN value is specified. After a base DN value is provided, the User DN field updates to the base DN entry.
    The auto-filled user DN entry may be replaced with customer-specific settings. If needed, specify additional user DNs by clicking the green '+' button and entering a valid user DN value. A maximum of six user DNs may be specified.
  8. In the Group DN field, enter a valid group DN value.
    Important: The Group DN field remains blank until a base DN value is specified. After a base DN value is provided, the Group DN field updates to the base DN entry.
    The auto-filled group DN entry may be replaced with customer-specific settings. If needed, specify additional group DNs by clicking the green '+' button and entering a valid group DN value. A maximum of six user DNs may be specified.
  9. In the Hosts DN field, enter a valid host DN value.
    Important: The Hosts DN field remains blank until a base DN value is specified. After a base DN value is provided, the Hosts DN field updates to the host DN entry.
    The auto-filled host DN entry may be replaced with customer-specific settings. If needed, specify additional host DNs by clicking the green '+' button and entering a valid host DN value. A maximum of six user DNs may be specified.
    Figure: LDAP Additional User, Group, and Host DN Values Screen
  10. To require the Lustre cluster to use authentication to bind to the LDAP server, perform the following.
    Figure: LDAP Storage Cluster Authentication Checkbox Screen
    1. Check the Storage cluster must use authentication to bind to this LDAP server box.
    2. In the Bind DN field, enter a valid bind DN value.
    3. In the Password field, enter a valid password.
      The password corresponds to the Authentication DN.
    4. In the Password Retype field, re-enter the password.
  11. Click Save.